|
|
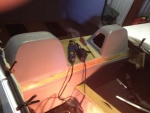
IMG_6977
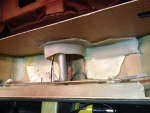
The white stuff you see is low-expansion foam that was squirted in to provide support so this wouldn't happen. Unfortunately, I could not get foam under the port side sufficiently to support that side. That's where the crack developed.
Date: 10/19/2013
Views: 4110
|
|
|
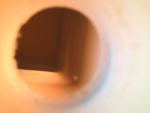
IMG_6994
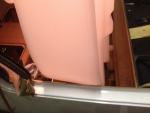
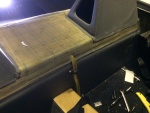
Seeing where the passenger door sill will have to be cut to allow the tank to go in.
Date: 10/21/2013
Views: 4363
|
|
|
|
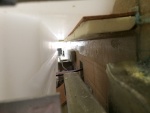
IMG_7014
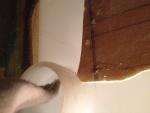
Next catch was where the filler needed to go into its' position. There was a piece blocking which had to be removed.
Date: 10/23/2013
Views: 5474
|
|
|
IMG_6976
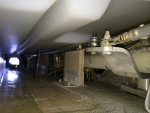
At this point all that's left is that portion of the tank which was bonded to the back of the back rest.
Date: 10/19/2013
Views: 3710
|
|
|
|
IMG_7568
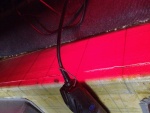
And reconnecting the aileron tie rods.
Date: 03/29/2014
Views: 5224
|
|
|
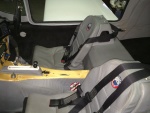
IMG_7736
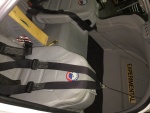
Reinstalled the shoulder harnesses and seats
Date: 05/10/2014
Views: 4908
|
|
|
|
IMG_7029
Supporting material in the form of rigid polyurethane sheet and micro/epoxy mix are laid out on the bottom of the fuselage.
Date: 10/31/2013
Views: 3852
|
|
|
IMG_6973
In this view fore is down, aft is up, port to the right and starboard to the left.
Date: 10/18/2013
Views: 3775
|
|
|
|
IMG_6962
The cut on the front side
Date: 10/17/2013
Views: 4106
|
|
|
IMG_7027
The underside of the fuel tank is covered in plastic wrap which will prevent the tank from bonding to the epoxy in the micro.
Date: 10/30/2013
Views: 3855
|
|
|
|
IMG_6956
Back side of the new tank.
Date: 10/17/2013
Views: 3801
|
|
|
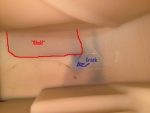
IMG_6973_em_sa
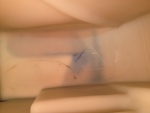
Here I have annotated the important elements. The red outlines the fiberglass support bonded to the bottom of the tank. Blue arrow points to the blue crack. The crack formed exactly as a stress analysis says it should, at 45º to the corner of that supp
Date: 10/18/2013
Views: 3286
|
|
|
|
IMG_7430
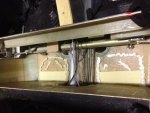
The front has bonded nicely around the sight gage entry.
Date: 03/11/2014
Views: 3994
|
|
|
IMG_7373
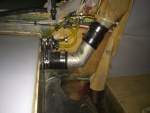
The vent system with all vent lines from the fuel sight gage and tank vents connected to the aircraft filler vent system.
Date: 02/22/2014
Views: 4339
|
|
|
|
IMG_7712
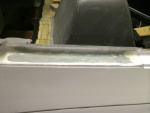
Door sill repaired.
Date: 05/04/2014
Views: 5264
|
|
|
IMG_7767
The sight gage with calibration markers.
Date: 05/18/2014
Views: 4585
|
|
|
|
IMG_6958
Tear out the interior to gain access to the upper part of the back where the fuel tank resides.
Date: 10/17/2013
Views: 3927
|
|
|
IMG_7231
One final check to make sure everything fits and supports the tank.
Date: 01/26/2014
Views: 4143
|
|
|
|
IMG_6855
But I can't get it past the entrance to the tank. Looks like I'll have to tear into things.
Date: 10/01/2013
Views: 4164
|
|
|
IMG_7738
Everything pretty much back together. Eight months work at this point.
Date: 05/10/2014
Views: 7434
|
|