|
|
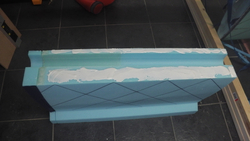
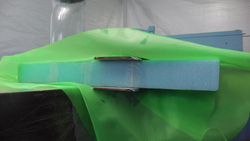
IMGA0756
Some dry micro to stick the block to the spar
Date: 05/05/2013
Views: 92114
|
|
|
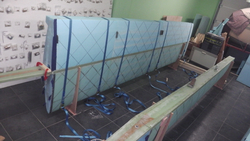
IMGA0754
These straps are great, one down one to go
Date: 05/05/2013
Views: 91545
|
|
|
|
IMGA0770
Two are a time baby yeah!!!!!
Date: 05/10/2013
Views: 78490
|
|
|
IMGA0750
Made a tube of bid to carry the pitot tubes from one block to another. This block is where the bell crank sits and the push rod goes to the aileron.
Date: 05/05/2013
Views: 92182
|
|
|
|
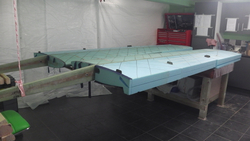
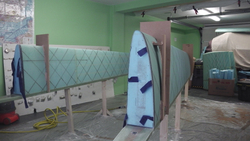
IMGA0722
Just testing out the rear blocks for an idea what it will look like
Date: 04/24/2013
Views: 93827
|
|
|
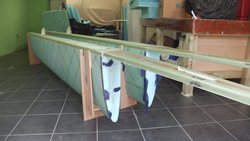
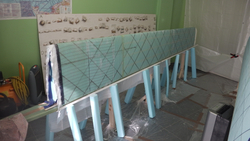
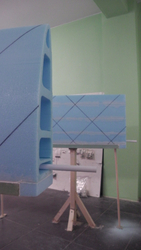
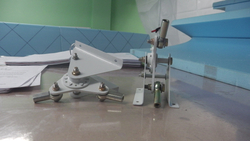
IMGA0712
Made some stands and a reference plate which is at 90 degrees to the spar
Date: 04/23/2013
Views: 103578
|
|
|
|
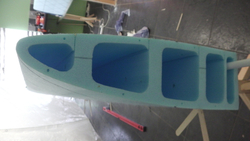
IMGA0716
Cracked off the jig, flipped over, and there we go iv got half a wing!!
Date: 04/23/2013
Views: 99633
|
|
|
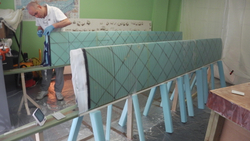
IMGA0732
The other rear blocks, laying up the ribs and including the mounting plates for the flap hinges.
Date: 04/25/2013
Views: 110726
|
|
|
|
IMGA0737
The small bloke with two mounting plates at the outrigger position.
Date: 04/26/2013
Views: 106384
|
|
|
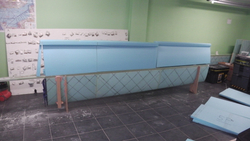
IMGA0701
First wings L.E layed up and peel plyed. The blue foam is keeping in place a 90 degree strip which is keeping the end of the uni cloth bent under to aid bonding to the rear of the spar. A helpful tip from Mike Gregory.......Oh wanted to say it took 8 and
Date: 04/20/2013
Views: 112159
|
|
|
|
IMGA0707
The next day me and my helper Ang did the other wing. This time it only took 6 and half hours so left us time to trim the other wing
Date: 04/21/2013
Views: 101231
|
|
|
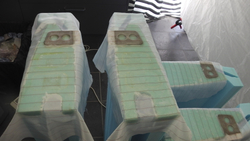
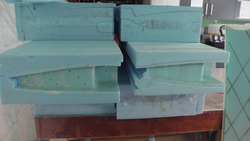
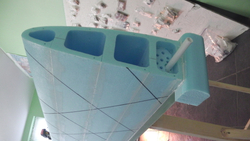
IMGA0680
These are the rear blocks where the bell cranks sit in. Note the vent holes
Date: 04/18/2013
Views: 112800
|
|
|
|
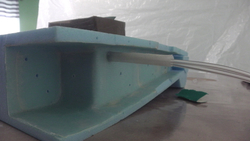
IMGA0673
Nicely shaped and blended in. The pipe sticking out runs all the way through the blocks and is to carry the wires from the fuselage to the wing tips for nav/strobe and hopefully landing lights
Date: 04/18/2013
Views: 104395
|
|
|
IMGA0660
You can see the wash out build into the block
Date: 04/17/2013
Views: 91251
|
|
|
|
IMGA0664
Scrap bit of foam which will get sanded to match the profile of the block. It takes up the gap between spar and end of the block
Date: 04/17/2013
Views: 101164
|
|
|
IMGA0661
Screws through ribs to align blocks.....must remember to remove them before the lay up
Date: 04/17/2013
Views: 92858
|
|
|
|
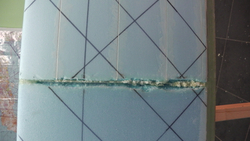
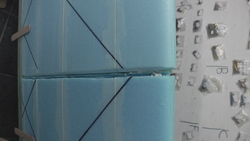
IMGA0641
EXOTHERM!! My worst moment yet
Date: 04/16/2013
Views: 71825
|
|
|
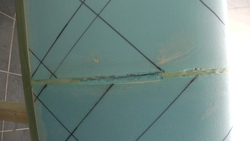
IMGA0657
After repair
Date: 04/17/2013
Views: 79638
|
|
|
|
IMGA0635
Rib ready for floxing
Date: 04/14/2013
Views: 73297
|
|
|
IMGA0620
Date: 04/09/2013
Views: 74585
|
|