|
|
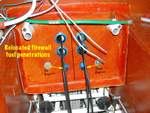
img0248copy
Date: 07/29/2007
Views: 12405
|
|
|
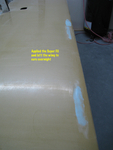
IMG_6474Ann
Date: 01/04/2008
Views: 12379
|
|
|
|
IMG_7366
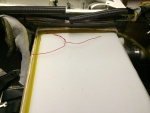
Applying the fiberglass/epoxy strips to the port side. Plastic wrap to prevent the epoxy from bonding to the tools used to hold the strip in place.
Date: 02/22/2014
Views: 12372
|
|
|
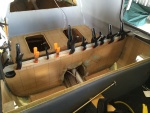
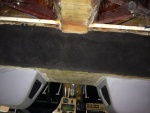
IMG_7233
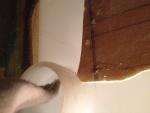
2-ply fiberglass strips were made up to be bonded to the inside of the unit. These strips went on all 4 sides. Here the strip is being bonded to the aft wall.
Date: 01/26/2014
Views: 12339
|
|
|
|
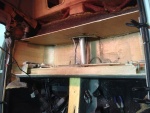
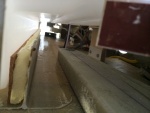
IMG_6982
The tank must go into this space.
Date: 10/21/2013
Views: 12327
|
|
|
DSC_0506_s
Date: 11/18/2007
Views: 12321
|
|
|
|
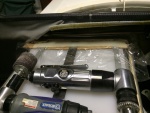
IMG_7365
Getting the sight gage plumbing in place.
Date: 02/22/2014
Views: 12290
|
|
|
IMG_6989
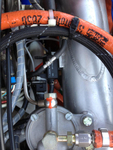
In addition, the aileron tie rod between the sticks is in the way and will have to come out.
Date: 10/21/2013
Views: 12287
|
|
|
|
IMG_7014
Next catch was where the filler needed to go into its' position. There was a piece blocking which had to be removed.
Date: 10/23/2013
Views: 12207
|
|
|
IMG_3577post
Next test, connect high pressure port from airbox directly to the "T" into the carb float bowl pressure lines and try a run. Still didn't work. Same smooth up to 4200/4300 RPM, smooth drop to 3200 RPM, smooth acceleration up to 4300 RPM, drop
Date: 08/03/2012
Views: 12184
|
|
|
|
DSCN4548Ann
Date: 07/02/2006
Views: 12182
|
|
|
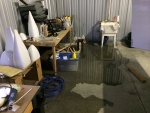
IMG_7535
Then we had a bit of drama as the sink developed a leak in the feed line.
Date: 03/20/2014
Views: 12085
|
|
|
|
RudderHinge02
Date: 06/06/2003
Views: 12043
|
|
|
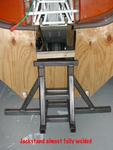
Jackstandx0Ann
Date: 04/03/2006
Views: 11805
|
|
|
|
IMG_0363post
Date: 08/11/2009
Views: 11717
|
|
|
IMG_2312
This was the more difficult fit of the three.
Date: 10/06/2011
Views: 11655
|
|
|
|
IMG_0009Ann
Date: 03/28/2008
Views: 11541
|
|
|
IMG_7230
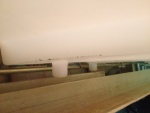
It was determined that a 1/4 in (6.4 mm) thick piece of rigid urethane foam topped with cork was needed to support the front "ledge" of the tank so it wouldn't sag.
Date: 01/26/2014
Views: 11408
|
|
|
|
IMG_7567
Time to start putting upholstery back in place.
Date: 03/29/2014
Views: 11360
|
|
|
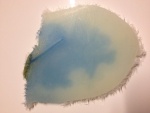
IMG_6975
The crack as viewed from the underside. it is about 1 5/8 in (4 cm) long and 1/32 in (1 mm) wide. Notice the blue staining on the underside surface.
Date: 10/19/2013
Views: 11215
|
|