|
|
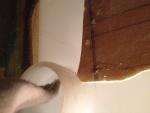
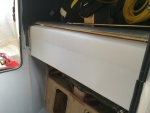
IMG_7014
Next catch was where the filler needed to go into its' position. There was a piece blocking which had to be removed.
Date: 10/23/2013
Views: 12333
|
|
|
IMG_7568
And reconnecting the aileron tie rods.
Date: 03/29/2014
Views: 12759
|
|
|
|
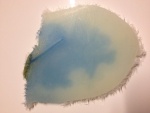
IMG_6975
The crack as viewed from the underside. it is about 1 5/8 in (4 cm) long and 1/32 in (1 mm) wide. Notice the blue staining on the underside surface.
Date: 10/19/2013
Views: 11316
|
|
|
IMG_6956 1
With the tank removed, the micro and urethane could be covered with cork. The cork serves to protect the tank from abrasion by the support materials. You can also see the strip of urethane applied to the top of the aluminum support for the tank ledge.
Date: 11/10/2013
Views: 10417
|
|
|
|
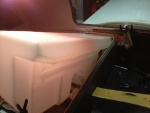
IMG_7233
2-ply fiberglass strips were made up to be bonded to the inside of the unit. These strips went on all 4 sides. Here the strip is being bonded to the aft wall.
Date: 01/26/2014
Views: 12477
|
|
|
IMG_6995
The cutout in the passenger door sill now allows entry of the tank.
Date: 10/21/2013
Views: 13866
|
|
|
|
IMG_7382
Blue fuel in the tank.
Date: 02/23/2014
Views: 10669
|
|
|
IMG_6976
At this point all that's left is that portion of the tank which was bonded to the back of the back rest.
Date: 10/19/2013
Views: 9752
|
|
|
|
IMG_7030
The tank was then put in place so that the urethane and micro could shape themselves to the bottom of the tank
Date: 10/31/2013
Views: 9883
|
|
|
IMG_6960 1
One needs some room near the cockpit so the wings come off. In addition, all the connections to the fuel tank were removed.
Date: 11/10/2013
Views: 10276
|
|
|
|
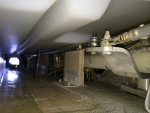
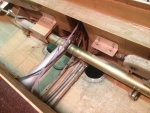
IMG_7005
The space with the aileron tie rod and starboard side support removed.
Date: 10/22/2013
Views: 10428
|
|
|
IMG_6985
And no amount of "coaxing" will prevail allowing entrance.
Date: 10/21/2013
Views: 9898
|
|
|
|
IMG_7305
Checked, double checked and again checked all the fits.
Date: 02/16/2014
Views: 10481
|
|
|
IMG_7319
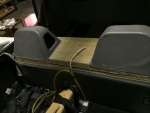
A test fit of the top. Check of the front.
Date: 02/17/2014
Views: 10041
|
|
|
|
IMG_7321
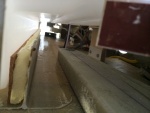
Checking the back.
Date: 02/17/2014
Views: 13179
|
|
|
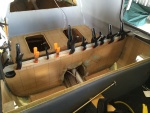
IMG_6973
In this view fore is down, aft is up, port to the right and starboard to the left.
Date: 10/18/2013
Views: 10003
|
|
|
|
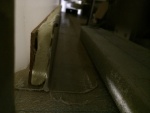
IMG_7230
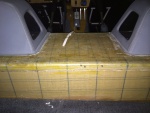
It was determined that a 1/4 in (6.4 mm) thick piece of rigid urethane foam topped with cork was needed to support the front "ledge" of the tank so it wouldn't sag.
Date: 01/26/2014
Views: 11529
|
|
|
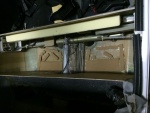
IMG_7232
Must have had the tank in/out two dozen times determining necessary clearances and supports.
Date: 01/26/2014
Views: 10956
|
|
|
|
IMG_6991
Finally, that fore-aft support piece is also in the way and will have to come out.
Date: 10/21/2013
Views: 10410
|
|
|
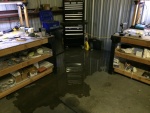
IMG_7536
It was a pretty good flow of water for a while. Flooding the back of the hanger. No real damage as, from previous experience, I try to keep things off the hanger floor in any case.
Date: 03/20/2014
Views: 13904
|
|