|
|
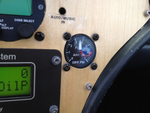
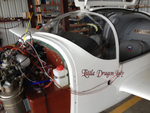
IMG_3217
Mounted the gage and turned on the electric fuel pump. Bingo! A pressure reading. It works now. So now I have a good operating differential pressure gage.
Date: 05/18/2012
Views: 6692
|
|
|
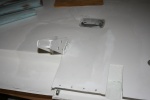
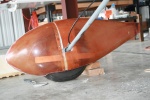
IMG_1301
Test fit of the console cover.
Date: 04/11/2011
Views: 6635
|
|
|
|
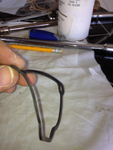
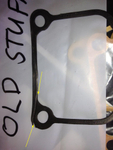
IMG_3301post
The issue being the softness and flexibility of the gasket material. Makes it difficult to ensure proper location while reattaching the bowl. The gasket is probably fine for a carb rebuild where you are doing it on the bench and can turn the carb over f
Date: 06/01/2012
Views: 6586
|
|
|
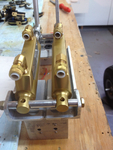
IMG_2706
Assembled everything. You can see the spacers fit to hold the master cylinders in alignment. Plumbing in place. The unit is about 1 1/2 in. taller than the old Jaymar. I'm wondering if it will fit or will I have to lower it in the mount? We'll see to
Date: 04/11/2012
Views: 6562
|
|
|
|
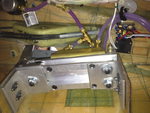
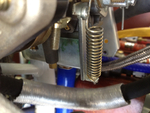
IMG_3214
Then I removed all the cheep crap connectors (with folded sheet metal pins) provided with the gage package, re-ran all the wiring and replaced the cheep connectors with good, 9-pin, sub-D connectors.
Date: 05/17/2012
Views: 6533
|
|
|
IMG_1416
End of May. Applied primer to all the repaired and patched areas. Port wing outboard flap bracket area.
Date: 05/31/2011
Views: 6529
|
|
|
|
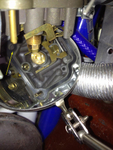
IMG_3213
As an aside, while trouble shooting this problem, I decided to try and get the differential pressure gage working. Spent quite a bit of time on this over a year ago but could never get it to work. Anyway, I reinstalled the differential sensor unit and p
Date: 05/17/2012
Views: 6504
|
|
|
IMG_3277post
After the engine run still surged, I investigated the seating of the float bowls & gaskets. This one shows how the new gasket wasn't properly located, see arrow.
Date: 05/30/2012
Views: 6446
|
|
|
|
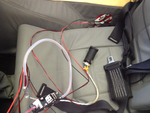
IMG_2755
New brake master cylinder set, installed and viewed from the tunnel. Brakes have been bled and seem to work well. Taxi testing will tell just how well they work.
Date: 04/24/2012
Views: 6412
|
|
|
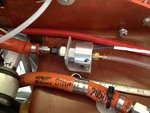
IMG_3367post
Request for fuel pressure input to the fuel pressure regulator. Installed a fuel pressure sensor on the input to the regulator. So now we have differential pressure out of the regulator and pressure into the regulator.
Date: 07/02/2012
Views: 6376
|
|
|
|
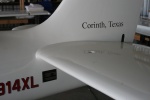
IMG_3220
Similar staining and residual fuel on the port side as well.
Date: 05/18/2012
Views: 6340
|
|
|
IMG_3290post
Here you can see where the gasket was cut by the bowl where it wasn't properly located.
Date: 05/31/2012
Views: 6277
|
|
|
|
IMG_1408
Still working on the brake plumbing. The translucent nylon was not fitting properly. Going back to the black stuff.
Date: 05/27/2011
Views: 6227
|
|
|
IMG_1304
Inside fitting
Date: 04/14/2011
Views: 6192
|
|
|
|
IMG_1593ann
Installed the master cylinder and parking brake and began connecting brake lines.
Date: 03/16/2011
Views: 6180
|
|
|
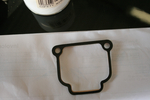
IMG_2599
Here the nitrile gasket is lying on top of the paper gasket, They are dimensionally identical. The nitrile gasket is quite soft and flexible. The paper gasket is stiff and hard.
Date: 05/30/2012
Views: 6172
|
|
|
|
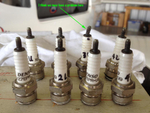
IMG_3331em
Turn the plugs over and one plug on #3 looks funny. Calls for a closer look...
Date: 06/12/2012
Views: 6172
|
|
|
IMG_3374em
Run the engine, check the pressures. All seems OK. 5 lbs into the regulator and 3.8 lbs out of the regulator. This is with the Billet mechanical pump. Which became the next source of concern.
Date: 07/04/2012
Views: 6168
|
|
|
|
IMG_1405
Put the stabs back on and check them out and checked out the trim for operation. All OK.
Date: 05/27/2011
Views: 6156
|
|
|
IMG_1412
Another issue with the pre-built cockpit module. The fuel tank was not supported on the aluminum angle. Bud suggested this could cause tank cracking and recommended some sort of support be added. I cut a wedge from a length of balsa and covered it with
Date: 05/28/2011
Views: 6091
|
|