|
|
dsc08620
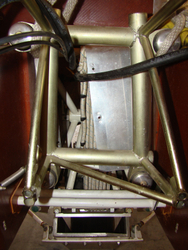
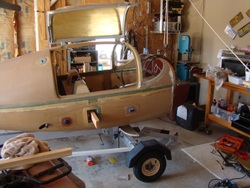
Removal of the mono firewall.
Date: 04/14/2012
Views: 38354
|
|
|
dsc09039
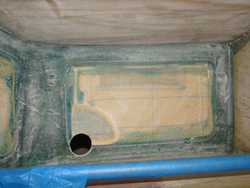
Port side done after cure.
Date: 01/23/2013
Views: 18744
|
|
|
|
dsc09054
Wetting out stbd side.
Date: 01/24/2013
Views: 17888
|
|
|
nex_2014_01_25_02
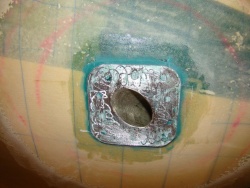
Starboard side of the air bubble fix on rib one. Used Flox with aeroboxy as a fillit.
Date: 01/25/2014
Views: 20664
|
|
|
|
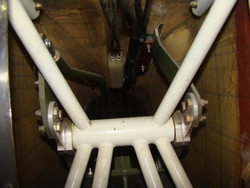
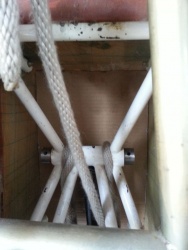
dsc08630
Though this was a neat pic of the mono wheel in the retracted position.
Date: 04/14/2012
Views: 20778
|
|
|
dsc09022
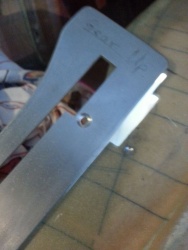
Here you see I used bondo on the shims and screwed them down into the block. The shims made sure the guide was level. Also note the hole drilled in the Aluminum angle and the shim. This is where I fixed the guide for the curing stage to ensure nothing
Date: 01/22/2013
Views: 21438
|
|
|
|
dsc08637
The mono wheel has been removed. Sad to see never used parts coming off the plane.
Date: 04/15/2012
Views: 19662
|
|
|
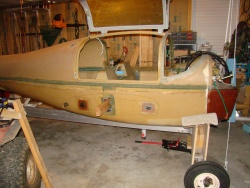
DSC08800
starboard side
Date: 06/05/2012
Views: 41957
|
|
|
|
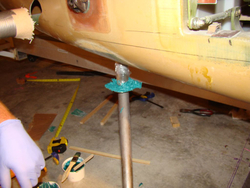
dsc09028
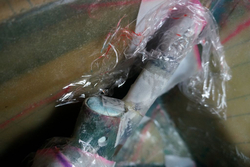
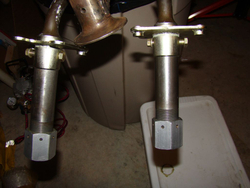
Here the axles are getting the green goop. I used car carnauba wax as a release agent. Worked well jut get it on there thick. We also wrapped the top of the sockets with glad wrap to keep contaminates off of it while we moved it around.
Date: 01/22/2013
Views: 20662
|
|
|
20141102_154504
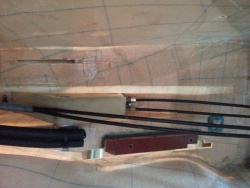
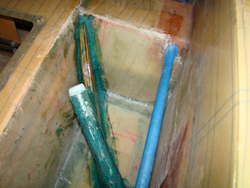
Cut old fuel lines. Gona have to replace them anyways. Now I just need to remove the stop block where the gear handle went.
Date: 11/02/2014
Views: 40362
|
|
|
|
nex_2014_01_25_32
nex_2014_01_25_32.jpg
Date: 01/26/2014
Views: 24546
|
|
|
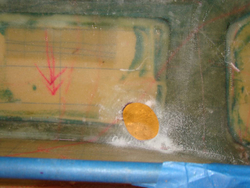
2012-08-18_19-58-15_689
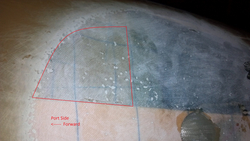
Port side. Red highlighted area shows area with little reinforcement on inside. This is before I did the belly layup per the manual.
Date: 08/19/2012
Views: 20839
|
|
|
|
20141102_153539
Out. Ad you can see the screw is sill in the nut plate. it came out later.
Date: 11/02/2014
Views: 41913
|
|
|
dsc09050
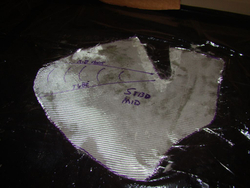
Stbd. side ready for the bid.
Date: 01/24/2013
Views: 17804
|
|
|
|
20141102_161049
20141102_161049.jpg
Date: 11/02/2014
Views: 33086
|
|
|
dsc08640
OK not the best shot but here you can see I used the jack to move the rear rib in place under the airframe being careful not to pinch the belly. I then secured the rib in place but using some drywall screws in the 2x6. This way any weight will be transf
Date: 04/15/2012
Views: 23756
|
|
|
|
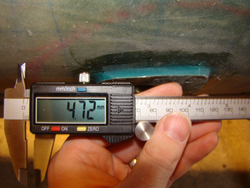
dsc09040
The gap from the bottom of the socket and the belly is as you see. The only way to get it all the way down was to lower the belly to 15" which was not considered an option. Belly hight is 16.0" with the axle width at 82.50" and axle cent
Date: 01/23/2013
Views: 19879
|
|
|
dsc09024
I was really anal about keeping the socket holes tight. This proved to be more work than it was worth and was fighting the tight fit when it came to locating the axles. Do yourself a favor and just make them a little bigger, 1/8 or so. This gap will be
Date: 01/22/2013
Views: 21030
|
|
|
|
dsc08627
The monowheel landing gear is in the up position and resting on the main wheel with some of the weight held by the block and tackle. This was taken just before putting on the braces to keep her from rolling. Been trying to get rid of that tv in the back
Date: 04/14/2012
Views: 29624
|
|
|
dsc09070
While the layups are curing we stared work on the axles. Had to ream out the holes forMG02.
Date: 01/25/2013
Views: 19424
|
|