|
|
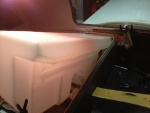
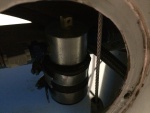
IMG_6985
And no amount of "coaxing" will prevail allowing entrance.
Date: 10/21/2013
Views: 4134
|
|
|
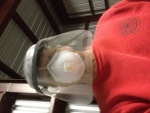
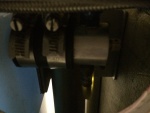
IMG_7285
The new sight gage running up the back rest. 2 P-clips hold it in place. The new sight gage is also back lit with a strip of LED lights.
Date: 02/13/2014
Views: 4132
|
|
|
|
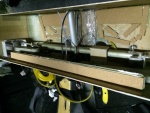
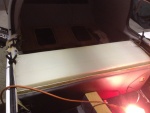
IMG_7319
A test fit of the top. Check of the front.
Date: 02/17/2014
Views: 4114
|
|
|
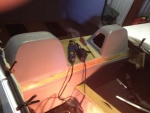
IMG_6958
Tear out the interior to gain access to the upper part of the back where the fuel tank resides.
Date: 10/17/2013
Views: 4087
|
|
|
|
IMG_6966
Selfie of the protective gear needed. There was a LOT of fiberglass dust flying during the cutting.
Date: 10/17/2013
Views: 4049
|
|
|
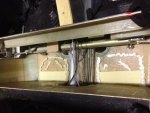
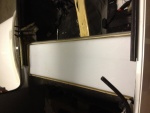
IMG_7226
Here the urethane on the aluminum ledge has also been covered with cork. The cork both served to protect the tank and the urethane.
Date: 01/19/2014
Views: 4029
|
|
|
|
IMG_7029
Supporting material in the form of rigid polyurethane sheet and micro/epoxy mix are laid out on the bottom of the fuselage.
Date: 10/31/2013
Views: 4012
|
|
|
IMG_7027
The underside of the fuel tank is covered in plastic wrap which will prevent the tank from bonding to the epoxy in the micro.
Date: 10/30/2013
Views: 4005
|
|
|
|
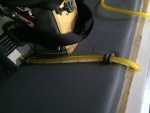
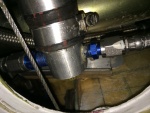
IMG_7356
The starboard side outlet with all fuel lines connected.
Date: 02/19/2014
Views: 4003
|
|
|
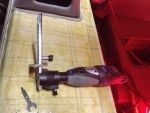
IMG_6960
The rotary tool that did most of the cutting. Front and rear sides of the back rest.
Date: 10/17/2013
Views: 3980
|
|
|
|
IMG_6843
Back from KOSH, I get out my video snake and try to run it down into the tank to find the leak.
Date: 10/01/2013
Views: 3976
|
|
|
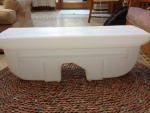
IMG_6957
Front side of the new tank.
Date: 10/17/2013
Views: 3967
|
|
|
|
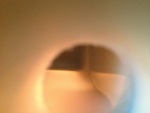
IMG_7382
Blue fuel in the tank.
Date: 02/23/2014
Views: 3952
|
|
|
IMG_6956
Back side of the new tank.
Date: 10/17/2013
Views: 3932
|
|
|
|
IMG_6973
In this view fore is down, aft is up, port to the right and starboard to the left.
Date: 10/18/2013
Views: 3917
|
|
|
IMG_6971
The top of the old tank exposed. At this point the rotary tool was used to attack the old tank.
Date: 10/18/2013
Views: 3902
|
|
|
|
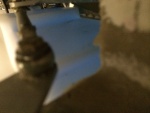
IMG_7383
Port fuel outlet . There was one small leak on the outlet to the fuel selector. I had wrenches ready, just in case, so it was easy to tighten that last bit to end the leak.
Date: 02/23/2014
Views: 3861
|
|
|
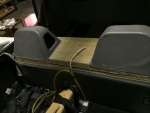
IMG_6976
At this point all that's left is that portion of the tank which was bonded to the back of the back rest.
Date: 10/19/2013
Views: 3838
|
|
|
|
IMG_7030
The tank was then put in place so that the urethane and micro could shape themselves to the bottom of the tank
Date: 10/31/2013
Views: 3710
|
|
|
IMG_7384
Starboard side fuel outlet. No leaks here
Date: 02/23/2014
Views: 3654
|
|