|
|
IMG_0044post
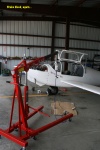
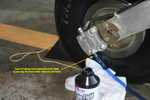
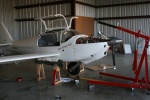
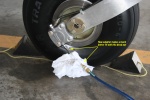
So it's back to bleeding the brakes again. Pull the lines out so there's no high spots and there's an "all up" run to the master cylinder. Connect the bleed contraption and wait.
Date: 07/08/2010
Views: 3165
|
|
|
IMG_7384ann
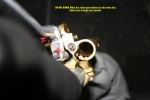
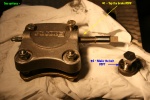
The threads on both fittings are 24/in. So that's a match. The issue is one is straight and the other pipe thread.
Date: 03/07/2010
Views: 2753
|
|
|
|
IMG_0035
2010 07 06 - Wondered how the new brake would work on retraction. Set up for retraction testing. LG lever went to about 1/2" (1.275 cm) from the up lock and wouldn't go any further. Hitting something. Spent several hours trying to see what what
Date: 07/06/2010
Views: 2881
|
|
|
IMG_0042post
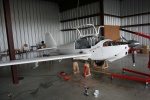
2010 07 08 - Back to the airport and back under the aircraft. With more aggressive abrasives, I was able to relieve the rub just a bit more. Not much at all, as you can see from the picture.
Date: 07/08/2010
Views: 3586
|
|
|
|
IMG_0915post
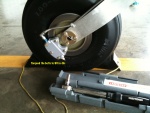
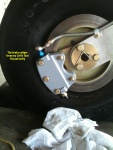
I stuffed the brake line back into the aircraft, tied it all down and screwed it to the swing arm. Bolted the new caliper to the brake disk and torqued it to 90 in-lbs.
Date: 07/01/2010
Views: 2613
|
|
|
IMG_9536ann
Date: 06/03/2010
Views: 2866
|
|
|
|
IMG_9556ann
What the heck... There were dead bugs all over the master cylinder. What's going on here. Get out a light, the brake fluid reservoir is full of dead bugs! $#!&$%@%^&*%@$#%%&*&^@$%@%$%$@^#$%^!!!!! Seems that wile I was spending a month
Date: 06/06/2010
Views: 2761
|
|
|
IMG_7269post
Date: 02/21/2010
Views: 3036
|
|
|
|
IMG_7267post
Date: 02/21/2010
Views: 2755
|
|
|
IMG_0037
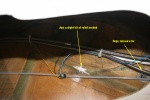
More retraction tests. Closer, but still won't quite go into up lock. Maybe 1/4" (0.635 cm) from engaging. Back under for a couple more hours before I finally see where the blue from the fitting is rubbing on the side of the tunnel where the seat
Date: 07/07/2010
Views: 2826
|
|
|
|
IMG_7380ann
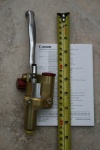
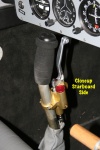
This pic is a closeup of the starboard side of the master cylinder. The red thing is the screw cap covering the brake fluid reservoir.
Date: 03/07/2010
Views: 3094
|
|
|
IMG_7540ann
That leaves two choices: #1 - tap the brake in BSPP threads or #2 - run the BSPT die over the bolt to thread in BSPT. The brake being aluminum and the bolt being stainless steel, I decided to go with #1 as it seemed easier.
Date: 04/18/2010
Views: 2654
|
|
|
|
IMG_1215ann
Date: 06/13/2010
Views: 2785
|
|
|
IMG_1233ann
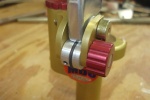
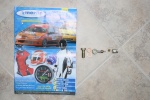
Went home and pulled a brake caliper off my Little Toot project. Brought it out to the hanger and the darn thing fits. So I have ordered a single puck version of the same brake caliper. When it arrives, it will go on and I'll replace the banjo hose end
Date: 06/21/2010
Views: 2615
|
|
|
|
DSC04014_Large_post
Date: 10/19/2009
Views: 3257
|
|
|
IMG_1217ann
Date: 06/13/2010
Views: 2841
|
|
|
|
IMG_7387ann
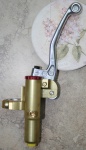
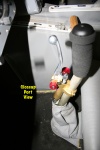
This pic shows the port side of the master cylinder. The red knob is the parking brake. You squeeze the brake lever and turn the knob (top back toward you) and release the lever. This holds the brake on. To release the brake you simply squeeze the bra
Date: 03/07/2010
Views: 3065
|
|
|
IMG_9562ann
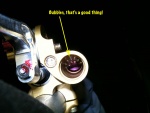
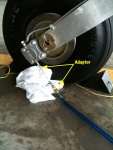
2010 06 06 - Made up an adaptor that fits the bleed and doesn't leak. Began to run fluid into the system. Went up to the master cylinder/reservoir to check on progress. Was I getting bubbles through the bit of fluid it put in back on the 3rd?
Date: 06/06/2010
Views: 2738
|
|
|
|
IMG_1218ann
Date: 06/13/2010
Views: 2943
|
|
|
IMG_7428post
My new banjo hose end for the brake arrived today. Good work Merlin Motor Sports.
Date: 03/15/2010
Views: 2591
|
|