Login
EuropaOwners N914XL - Bob Borger, N.Texas, USA: 99.0 hrs - Subsequent Flights Album has been updated as of 2016 05 16. Tri-Gear Conversion
Advanced Search
Mount with WebDAV RSS Feed for this Album View Latest Updates View Popular Items View Random Items View Slideshow (Fullscreen)

N914XL - Bob Borger, N.Texas, USA: 99.0 hrs - Subsequent Flights Album has been updated as of 2016 05 16.

1. DSC_0064 2. First Flight 3. Subsequent ... 4. Tri-Gear... 5. Weight... 6. Aviation... 7. OSHKOSH 2007 ... 46. Fuel Tank...

Random Images

15_G

15_G

Date: 06/19/2009 Views: 4182

TrimSwitchesWire00S

TrimSwitchesWire00S

Date: 02/13/2005 Views: 4646

IMG_2334

IMG_2334

Date: 07/11/2005 Views: 4855

Newest Image

EAA SITE

EAA SITE

Date: 08/23/2023 Views: 693387

Tri-Gear Conversion

After being blown off the runway on takeoff and into a ground loop at 40 kts, it has been decided to convert the aircraft from Monowheel to Tri-gear. This album documents this conversion and repair work. The album is not comprehensive as I often was up to my elbows in epoxy, fiberglas, Araldite and other nasty things when I would have wanted a picture or two. Still, you should be able to get an idea of what was involved. Work has almost been completed. The aircraft is flying again. Remaining work is to make interference fairings for the landing gear leg fairings to the wheel pants and body. I'll put the wheel pants on tomorrow and see how it goes. Without any go-fast fairings it does 110 KTS at 5000 RPM, 28 in MP & 3.6 gph.

Date: 10/02/2010
Owner: rlborger
Size: 345 items
nextlast
first previous
IMG_1280ann

IMG_1280ann

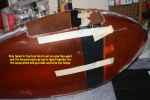
Poly has been taped over the front half. This will prevent the interior layup from sticking to the front half forming the joining flange. The front and rear have been taped together in preparation for the inner layup.

Date: 03/29/2011
Views: 4209
IMG_1282ann

IMG_1282ann

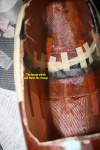
Interior view showing the layup applied.

Date: 03/29/2011
Views: 4046
IMG_1283ann

IMG_1283ann

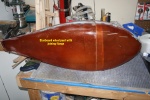
The starboard wheel pant with all the tape and poly removed. Almost ready for anchor nuts and screws. Unfortunately, I left one area of the flange too thing and had to add small pieces of glass. Tomorrow will be anchor nut day for it.

Date: 03/30/2011
Views: 4032
IMG_1284ann

IMG_1284ann

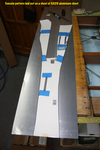
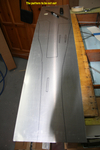
Cut a piece of aluminum for the console cover. Laid out the pattern on the aluminum sheet and traced around it.

Date: 03/30/2011
Views: 3710
IMG_1285ann

IMG_1285ann

The tracing for the cover cut out.

Date: 03/30/2011
Views: 3489
IMG_1287ann

IMG_1287ann

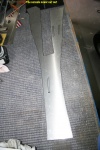
The console cover cut out. Now I have to figure out how to make the cuts for the slots for the brake levers and parking brake. Later there will be cutouts for the flap and trim switches as well as the brake reservoir.

Date: 03/30/2011
Views: 4597
IMG_1666

IMG_1666

Bonded the bushing reinforcements onto the cockpit module bushings

Date: 04/13/2011
Views: 4065
IMG_1667

IMG_1667

This had not been done on my quick build cockpit module. Next will be to add the two plies of BID.

Date: 04/13/2011
Views: 3877
IMG_1668

IMG_1668

Began fitting the brake fluid reservoir.

Date: 04/13/2011
Views: 4299
IMG_1669

IMG_1669

Evaluating how the reservoir will be mounted/attached.

Date: 04/13/2011
Views: 3996
nextlast
first previous
Page: 1 ... 17 18 19 20 21 22 23 ... 35
Powered by Gallery v2.3